After seeing Kelly and Amanda take their stab at dyeing sun shirts, I too, wanted to be fun and trendy. I used a cheap SmartPak sunshirt, which I’ve also discovered I really like, so added bonus there.
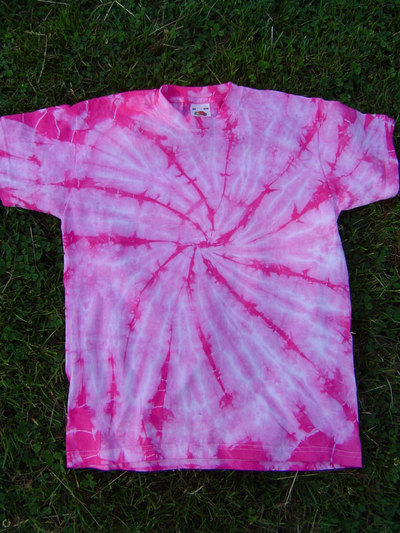
My first shot was tie dye. I REALLY wanted a tie dye sun shirt (yes, according to Emily I am on a one-woman mission to get kicked out of the barn for wearing ridiculous outfits). I bought the RIT Synthetic Dye, got set up and… dove in. Knowing you have to keep the shirt in the dye, submerged, I didn’t think I’d be able to do multi color tie dye, but I figured maybe a single color starburst? Rubber banded it up like old-school tie dye, pushed away my summer camp 2001 memories and went for it. Unfortunately, because of the way the dye sinks in and spreads around, it all just turned… pink.
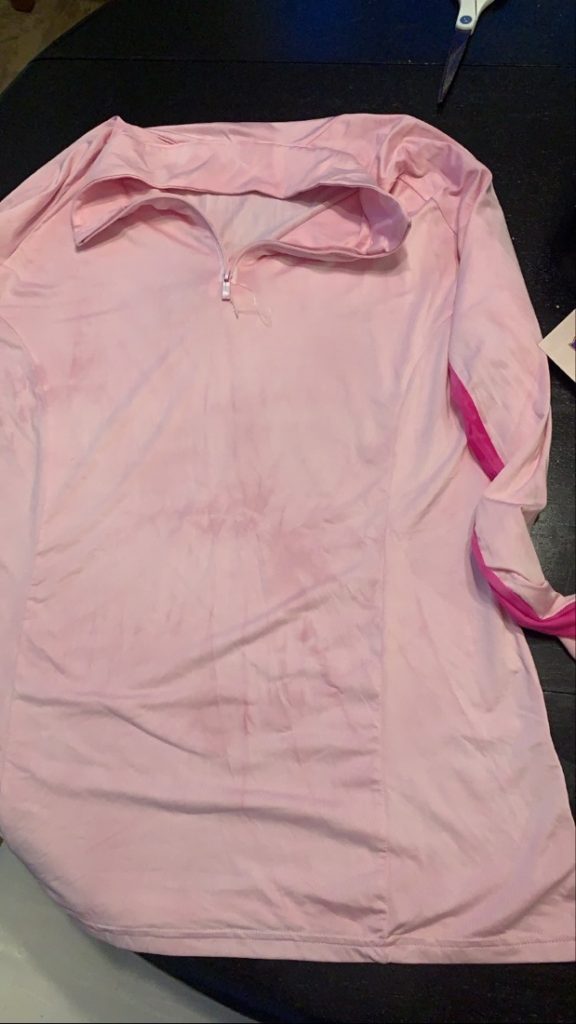
Dismayed, I washed it, tossed it into a pile and stopped thinking about it. Then Amanda’s posts popped up and we started chatting and she threw it out – ombre.
Game on.
So I used the last of my dye, took the shirt and put it into the pot bottom first, keeping it sort of.. upright? Just so it didn’t go in like a wad of fabric. I set timers on my phone for 10 minutes and every 10 minutes, I pulled a little bit out (so the collar stayed out, then gradually I’d pull a little more out of the pot). I draped it on the handle of the pot I was using, although it was a little ghetto and I definitely got dye water all over the place. This wouldn’t work if you have a gas stove, you might have to hold it or find a way to like, string it up?
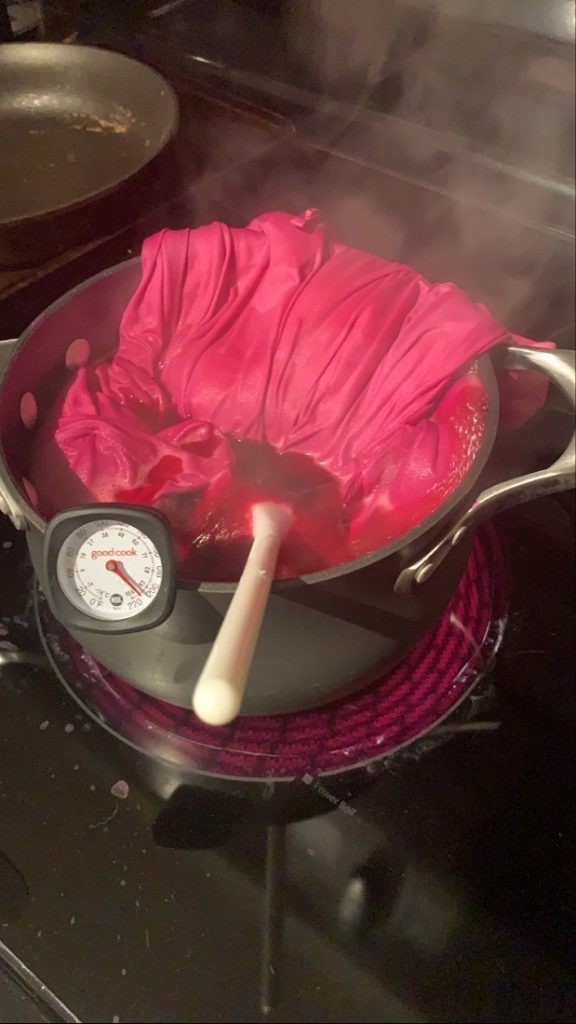
I’d keep stirring the pot to keep it swirling around the entire shirt while I was waiting (great time to catch up on EquiRatings podcasts). After about an hour, I pulled the entire thing out, followed the rinsing directions and tossed it into the wash.
This morning, I had this!
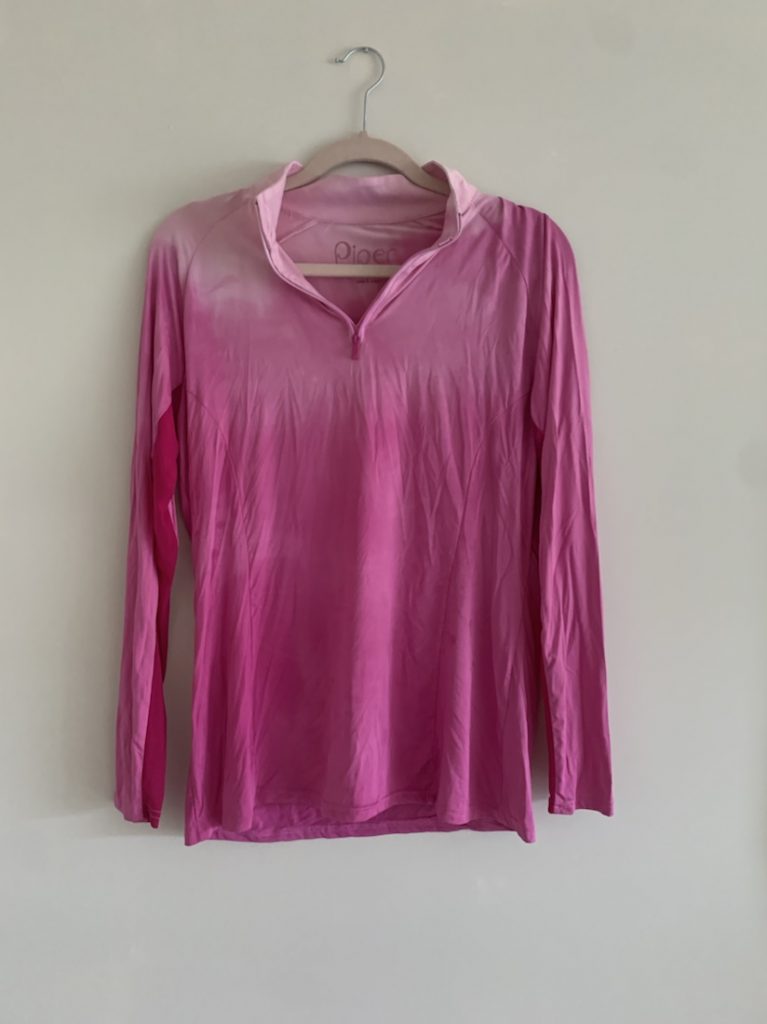
Overall, I’m calling it a success because I think it’s pretty cool looking, albeit not perfect.
If I did it again I’d change a few things:
- Bigger pot – allow it to lie flatter and I think would help not cause any splotchy spots
- Timer at 5-8 minutes and move it reaaallllyy incrementally. Mine goes to dark a little higher up than I’d like it to
- Find a way to suspend it above the pot and gradually raise it? This might be more of a feat of engineering than I’m willing to go for, BUT I think it would make the dye really even across
- Zip the collar
That’s all there is to it! It wasn’t hard, just a bit messy, but it all cleaned up pretty easily (minus my hands which are tinted pink because I basically never wear gloves for anything). Let me know if you try it and what your results are like – and if anyone figures out tie dye OMG TELL ME HOW.
5 Comments
I am dying (pun intended) to do this with my shirts now!
If I was super ambitious I’d totally try to do a rainbow one or a 3-color color melt (clearly I’m in too many crazy girls dyeing groups) but alas I’m not ambitious.
Um “girls” is supposed to say “hair”. Fucks sake, autocorrect.
Omg yes tie dye!!!!!! I also have a love for all things tie dye and am sad it didn’t work 🙁 Maybe tape instead of rubber bands? But it’s probably still bleed through… hummm…
I so wish tie dye would work! But I like the ombre! Nice job!